Creating a professional booklet in Microsoft Word is simple once you know how to set it up for print. Follow this step-by-step guide to prepare your file accurately and avoid common pitfalls before exporting your print-ready PDF.
Document Setup
1. Choose the Right Page Size and Add Bleed
Start by deciding your booklet size. For example, an A5 booklet will measure 148mm x 210mm. To include the required 3mm bleed on each edge, increase the page size to 154mm x 216mm.
In Word: Go to Layout > Size > More Paper Sizes. Enter your custom dimensions to accommodate bleed.
2. Set Up Margins and Safe Zones
Important content like text or logos should be kept at least 5mm from the edges (this is your safe zone). For text-heavy documents, we recommend setting margins to around 30mm.
In Word: Go to Layout > Margins > Custom Margins. Add a Gutter margin (e.g. 10mm) for binding space so that nothing gets lost in the spine.
3. Use the Built-in Booklet Feature (Optional but Handy)
Word has a feature that automatically arranges your pages into booklet format.
In Word: Go to Layout > Margins > Custom Margins > under Multiple Pages, select Book fold. This automatically sets up your booklet in landscape with correct page sequencing.
4. Ensure Fonts Are Embedded
If you’re using custom fonts, you’ll need to embed them to avoid any substitution during printing.
Windows: File > Options > Save > Tick "Embed fonts in the file"

Mac: Word > Preferences > Save > Tick "Embed fonts in the file"
To check: Open your PDF in Acrobat Reader > File > Properties > Fonts. It should say "Embedded Subset" next to each font.

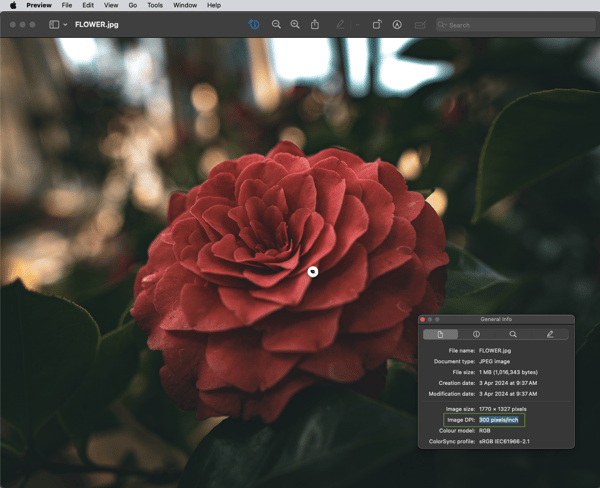
5. Use High-Resolution Images (300dpi)
All images should be 300dpi (dots per inch) at their final printed size to ensure crisp quality.
Check image resolution:
-
Windows: Open image > Properties > Details tab

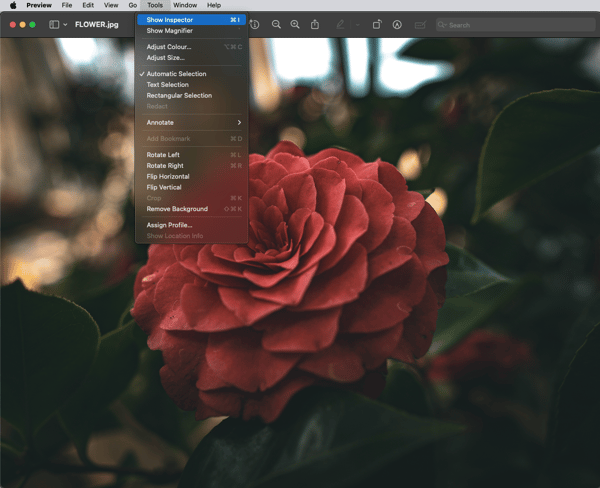
Mac: Open image > Tools > Show Inspector
Prevent Word from compressing images:
-
Windows: File > Options > Advanced > Image Size and Quality > Tick "Do not compress images in file" and set resolution to 330ppi

- Mac: Word > Preferences > Edit > Image Size and Quality > Same settings

6. Exporting Your Booklet as a Print-Ready PDF
Your booklet pages should run in order from front cover to back cover (do not export as spreads).
Windows & Mac: File > Save As > Select PDF > Click Options and ensure the file is set to ISO 19005-1 compliant (PDF/A)
Windows

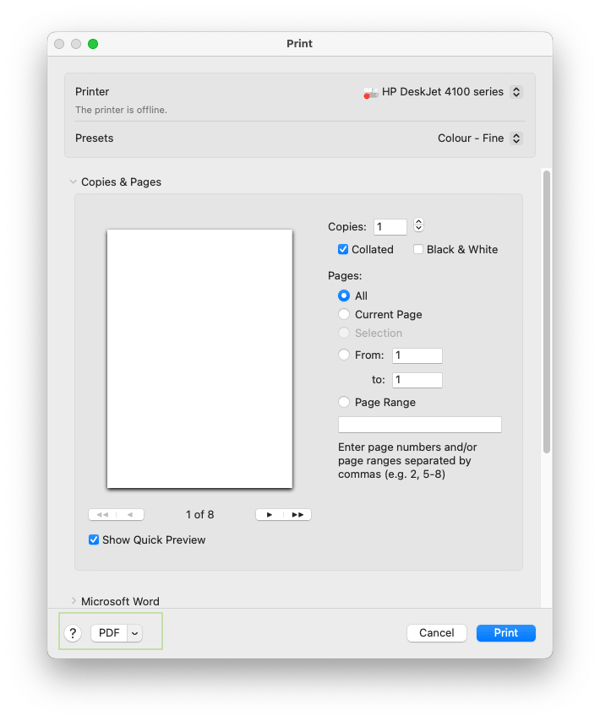
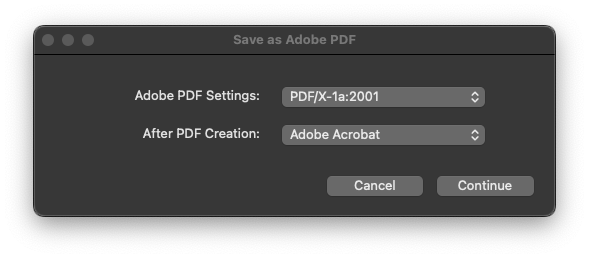
For best results: Export using Adobe Acrobat: File > Print > Adobe PDF > Select preset PDF/X-1a:2001for print compatibility

Mac
After configuring these settings, save your document to a secure location, prepared for upload and printing.
Troubleshooting Tips
-
Fonts not embedding? Double-check that the embed option is enabled and avoid using fonts restricted by licence.
-
Images look blurry? Ensure they are 300dpi and inserted at actual size.
-
Pages not printing in booklet order? Use Tradeprints new page turning software to see your book before printing.