To print your design with a special finishing such as foil or raised gloss, selective white and a custom shape follow these steps to set up your document with the necessary spot colors and layers. We recommend using a vector-based program like Adobe Illustrator for this set up.
Step 1: Set Up Your Layers
- Open your vector-based program (e.g., Adobe Illustrator).
- Create four layers in your document:
- ‘White’ – For your selective white underpin.
- ‘KissCutting’ – For your custom cut shape.
- ‘Finishing’ – For your foiling or raised gloss finish.
- ‘Artwork’ – For your printed artwork.

Step 2: Create New Spot Colors
-
Open the Swatches panel.
-
Create a new swatch for each of your selected options:
Swatch 1 - ‘White’ (case sensitive):
- Set the color type to ‘Spot Color’.
- Set the color values to:
- Cyan (C): 100
- Yellow (Y): 0
- Black (K): 0
Swatch 2 - ‘KissCutting’ (case sensitive):
- Set the color type to ‘Spot Color’.
- Set the color values to:
- Cyan (C): 0
- Magenta (M): 100
- Yellow (Y): 0
- Black (K): 0
Swatch 3 - ‘Finishing’ (case sensitive):
- Set the color type to ‘Spot Color’.
- Set the color values to:
- Cyan (C): 0
- Magenta (M): 50
- Yellow (Y): 100
- Black (K): 0
 Download all three swatches from here - Pre-made Swatches
Step 3: Create Your Design
-
Place the design elements on the ‘Artwork’ layer that you wish to be printed. Special elements must be created on their respective layers.
-
White: The white underpin will sit under the artwork once printed. Ensure that any sections in your printed design that you wish to be white are knocked out of the artwork so the white underpin can show through.
-
KissCutting: Your custom shape must be created using a 0.25pt continuous stroke. It must match the height and width of your canvas.
-
Special Finishing: For foiling, do not represent the foil on the ‘Artwork’ layer. As the foil is applied on top of your design, including it in the print layer may cause misalignment and an undesired look.
-
Step 4: Overprint
- Select the special elements on the three layers.
- Go to the Attributes menu.
- Choose ‘Overprint Fill’ for the ‘White’ and ‘Finishing’ layers and ‘Overprint Stroke’ for the ‘KissCutting’ stroke.
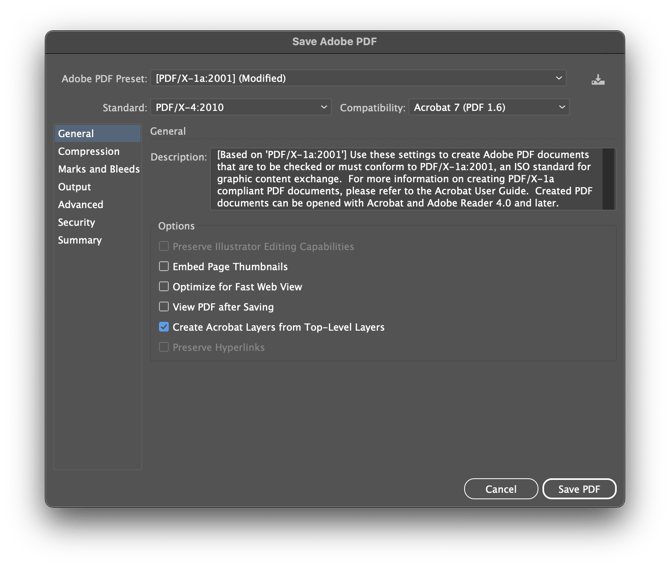
 Step 5: Export Your File
- Review your design to ensure everything is correctly set up.
- Export your file as a PDF.
- Use the PDF/X-4:2010 preset for best results, as it maintains the spot color information needed for printing.